

When the temperature starts warming up and the sun starts shining for longer and longer each day, I start to bring spring into all aspects of my life. I wear more fresh perfumes than sultry scents, break out the lilac and beach scented candles, and throw open my windows (so what if the high is 45 degrees F? This is the Midwest. That’s basically bikini weather!). Among these changes is a switch up in my makeup products. To me, spring makeup is polished but light. It’s not quite time for the messy sexy bronzers and neon that can be rocked during the summer, but the vampy lips and flawless full coverage foundations of winter are a little too heavy. Typically I like to go with a fresh, natural look paired with a bright lip. It looks pulled together and chic yet still has a hint of fun. Here I’ve thrown together the look I’ve been wearing a lot lately that helps me perfectly transition from winter to spring!

First, I’m going to start with a pore minimizing primer, such as my Maybelline Baby Skin Instant Pore Eraser. To be honest, I do not like this particular one, but I want to use it up, and I’m running low on the one I actually DO like (Benefit’s The Porefessional), so I’ve been grabbing this instead. I smear it all over my face and wait about 5 minutes or so before moving on to the next step. This helps in sink it and do it’s job. If I were to immediately go in with my next product, I could end up with a big mess or a patchy application.

After my primer has set I go in with my lightest foundation, the Napoleon Perdis Boudoir Mist Spray Foundation. I’m in the shade Look 1. I absolutely love this foundation. When I first bought it, I was disappointed because I thought it applied funny. Once I got a hang of the application, however, I changed my tune. This is so incredibly light on the skin and yet has a buildable coverage. And it still looks like skin! And the shade is spot on! Ugh. So much love. I’ve never tried a spray foundation before this, but I really see a difference. I grabbed this when all Napoleon Perdis products were 75% off at Ulta, and now I’m so sad because it is currently only available at Nordstrom (that I know of) and I don’t have a Nordstrom anywhere near me. Plus this stuff is pricyyy. I don’t know how long the can is going to last me but I’m trying to ration it. Anyhow, I work in areas when applying this, spraying it lightly on one area and buffing it in using my Real Techniques Expert Face Brush before moving on to the next. Occasionally I’ll spray it on the back of my hand and dip my brush in, but I only use this method for the parts of my face I’m scared to spray (like around my eyes).

I apply a little bit of a lightweight highlighting concealer under my eyes, in between my brows, and on the outsides of my eyes and use th same brush I used for my foundation to gently blend it onto my face. Here I used Maybelline’s Dream Lumi Touch Highlighting Concealer. Since I don’t have too much to cover up int he way of dark circles, this just helps bring some life to my face. I also set this with a bit of powder to prevent creasing. Today I forgot powder so I actually used Estée Lauder’s Pure Color Eyeshadow in 10 Ivory Box. Hey, whatever works, right?

I always like to do my brows before doing my eye makeup. Especially if you have more nonexistent brows like I do, I think doing your eyeshadow before brows can easily lead to an overdone look. Brows frame the face and bring attention to the eyes, but if they’re done second, I find I try to use eyeshadow to bring attention to that area, and after filling in my brows the effect is too intense. If I fill in my brows first, I use less eye makeup and also have a better idea of where the shadows should be placed (hard to line up a wing with athe end of an eyebrow you can’t see). I’ve been a loyal Anastasia Beverly Hills Fan for a while, flipping between the DipBrow and the Brow Wiz, both in the shade Taupe. Clearly, I used the Brow Wiz today.

I’ve really been liking no-fuss eye looks lately. I think they pair perfectly with a spring bright lip and can work for both day or night. I used the Maybelline Color Tattoo 24 hr Cream Eyeshadow pot in Bad to the Bronze. It’s the perfect wash of color that adds dimension without looking too dark for the daytime. I was super skeptical about these not creasing on me sans primer, but they don’t! They blend well and stay put on the lid. These can also be used under powder eyeshadows as a base. If I do something in the evening, I usually take a darker brown powder eyeshadow and throw it in the crease and outer V and call it good.

Using my Modern Minerals small dome eyeshadow brush, I highlight my brow and inner corners with the Essence eyeshadow in Vanilla Milkshake. It has a touch of shimmer and is such a bargain, I picked this up during a sale for less than $0.50! I feel like this may also be a beautiful budget cheek highlight, but I’m not big into cheek highlighting so someone with more knowledge will have to test this out and let me know!

I get nervous using cream products because of my already oily skin, but I find this Stila Convertable Color to work wonderfully with this foundation. I use my Real Techniques Stippling Brush and dab it in the product, and then do a couple of dabs on the back of my hand to get off any excess color before stippling the remainder on my cheeks. I place blush a little further back because that is what works with my face shape. I have a ruddy Complextion to begin with, so I want to be very careful where I’m placing my blush as to not undo any covering up that I accomplished with my foundation. This way my flush is only where I want it. This sample in the shade Peony is perfect for traveling as well, and looks so natural.

While there is NOTHING wrong with letting your pale skin be pale, I like to add a hint of bronzer for dimension. I start with a liiiiight contour and blend, and add a bit on my forehead to balance it out. This also sets anything that may need setting. I use just the tiniest bit of Too Faced Chocolate Soleil Matte Bronzer in Medium/Deep and went in with a light hand. I want my real skin to show and to look healthy, not overly made up.
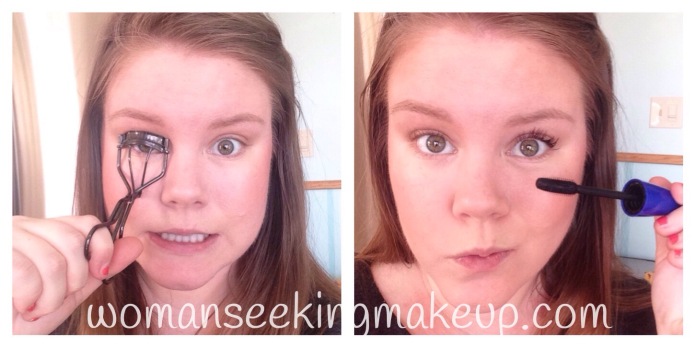
I skip eyeliner and give my lashes a quick curl using my Shiseido curler (you try taking a picture while wielding an eyelash curler -_-) and then add a couple coats of black mascara. Although I’m not a fan of plastic wands, I’ve really been impressed with Maybelline’s The Rocket Volum’ Express. The wand doesn’t poke or hurt my eyes, which is usually my biggest problem with plastic mascara wands.

Last but not least I pop on a bit of lip product. I have been obsessed with MAC’s Girl About Town lipstick lately. Unfortunately, i needed a more low maintainance lip today so instead went with my Revlon ColorBurst Balm Stain in 001 Honey. It’s the easiest shade to wear and because it’s in crayon form I can apply this without a mirror when on the go. It fades nicely as well, and is comfortable on the lips. It also smells like mint!

So there it is! A simple, easy look that is pulled together but natural. I included pictures in different lighting as well as close ups so you can see how the makeup wears in as real life as I can show with my iPhone. I think this just melts into the skin so flawlessly and creates that fresh faced look I wish I had naturally.

I am not wearing this same face look or mascara here, but I wanted to show what I meant by a simple face and bright lip. This is MAC’s Girl About Town. I wore this a week ago when I tried to force it to be spring. You’re welcome, by the way…pretty sure that’s why it’s now warmer. 😉
Do you switch up your look when the seasons change? How are you celebrating spring?
XOXO, WSM

My main change for warmer weather is brighter lipstick. I love dark vampy colors, but sometimes they look out of place on a sunny day. That’s when it’s time for a bright pink or coral! Or whatever floats your boat haha.
LikeLike
Exactly!
LikeLiked by 1 person
Very pretty! Xx
LikeLike
Why thank you! And ps I love that your post had lyrics from the FourFiveSeconds song by Rihanna/Kanye/McCartney! I am OBSESSED with it lately and have had it on repeat which I almost never do. I got so excited when I saw that! Haha
LikeLiked by 1 person
Lol. That song sure does get stuck In my head lol Glad it brought you happiness while reading!! ☺️☺️
LikeLike
Very nice look for spring!
LikeLike
Thank you!
LikeLike